File Descriptions
Now, let's explore each of the files you downloaded:
people.xlsx
This Excel file contains participant information in various columns:
- Email: Participant's email for sending certificates.
- Name, Surname, Institution: Information to include in certificates.
- Type: Identifier for determining the text to include (e.g., poster, talk, short talk).
- MyText: Column with different texts to be included on the certificates and based on the Type using Excel's IF command.
- SEND: Indicates whether to send an email to this participant.
- Subject and Body: Email subject and body content.
- Attachment Path (AttPath) and Attachment Name (AttName): File to attach and the name it will appear as.
This is the main configuration file. It is used by each of the scripts.
createcsv.py
This Python script, createcsv.py, extracts specific data from people.xlsx and saves it in a CSV file located at latex/tolatex.csv. The purpose of this script is to prepare the data for proper processing by LaTeX.
The extracted data may include participant names, surnames, institutions, or any other information needed for generating certificates. The CSV format ensures compatibility with LaTeX processing tools, allowing seamless integration into the certificate creation workflow.
To run the script, execute the following command in your terminal:
python createcsv.py
Make sure to run this script before generating certificates to ensure the data is correctly formatted for LaTeX processing.
latex/certs.tex
The LaTeX file, certs.tex, is the core document responsible for generating all certificates. It utilizes data such as \name, \surname, \institution, \talkname, \type, and \mytext to customize each certificate for participants. These commands serve as placeholders within the LaTeX document and get replaced with actual participant information during the compilation process.
It's essential to modify this file according to the specific needs and preferences of each organizer. Customize the layout, font styles, and any additional elements to align with the desired certificate design. The file includes a background image (background.png) to enhance the visual appeal of the certificates.
When you run the script to generate certificates, it compiles all certificates into a single PDF file, latex/certs.pdf. This consolidated PDF is later divided into individual certificates using the split script for easier distribution and organization.
Before running the script to generate certificates, ensure that latex/certs.tex is tailored to your requirements. You may need to adjust the layout, incorporate organization logos, or make any other modifications for a polished and professional appearance.
split.py
The Python script, split.py, plays a crucial role in the final stage of the certificate generation process. It takes the consolidated PDF file, latex/certs.pdf, and splits it into individual certificates. Each certificate is identified by the easyname variable configured in the people.xlsx Excel file for every participant.
Once executed, this script stores the separated certificates in the directory certificates/splitted. The use of easyname ensures that each participant's certificate is easily identifiable and organized.
Before running the script, make sure that latex/certs.pdf is generated, and the easyname variable is correctly configured for each participant in people.xlsx.
To execute the script, run the following command in your terminal:
python split.py
send.py
The Python script, send.py, automates the process of sending personalized emails to each participant. It retrieves participant emails from people.xlsx and sends an email to those with the value SEND = YES. The script uses the email subject and body obtained from people.xlsx. Additionally, it retrieves the attachment file specified in the attpath column, which is, by default, configured to include the associated certificate for each participant.
The script is designed to leverage Excel's internal referencing functionality, allowing easy customization of emails for each participant. This can be seen in the default example provided in the script.
Before running the script, ensure that the email configuration, subjects, bodies, and attachment paths in people.xlsx are correctly set for each participant. Additionally, ensure that the SEND column is appropriately configured to determine which participants should receive emails.
To execute the script, run the following command in your terminal:
python send.py
addsignature.py
The Python script, addsignature.py, facilitates the addition of electronic signature fields to each certificate. These signature fields are designed to enable electronic signatures at a later stage. By default, the script is configured to save the new files with signature fields in the directory certificates/withsignature, using the associated easyname from people.xlsx.
Using this script, you can prepare certificates for electronic signing, ensuring a seamless and efficient signing process.
Before running the script, ensure that the necessary configurations are in place and that the default settings align with your preferences. Additionally, make sure that the easyname values in people.xlsx are correctly associated with each participant.
To execute the script, run the following command in your terminal:
python addsignature.py
sign.py
The Python script, sign.py, streamlines the process of electronically signing all certificates at once using an electronic certificate. This script requires the electronic certificates in PEM format. If your certificates are in PFX format (commonly exported by Windows), you can use the pfxtopem.py script to convert them to PEM.
By running this script, you can efficiently apply electronic signatures to all certificates simultaneously, ensuring a consistent and secure signing process.
Before using this script, ensure that your electronic certificates are in PEM format. If needed, utilize the pfxtopem.py script to convert PFX to PEM.
To execute the script, run the following command in your terminal:
python sign.py
pfxtopem.py
The Python script, pfxtopem.py, serves the purpose of transforming a certificate in PFX format to PEM format. This conversion is essential for compatibility with the sign.py script, which requires certificates in PEM format for electronic signing.
This script needs to be configured properly with the passwords associated with the certificates. It ensures a seamless conversion process, allowing PFX certificates to be used within the signing workflow.
Before running this script, make sure to adjust the configurations for certificate passwords. This information is crucial for the successful transformation of PFX to PEM.
To execute the script, run the following command in your terminal:
python pfxtopem.py
Example
In this example, we will generate certificates without electronic signatures using the provided files from the ZIP archive.
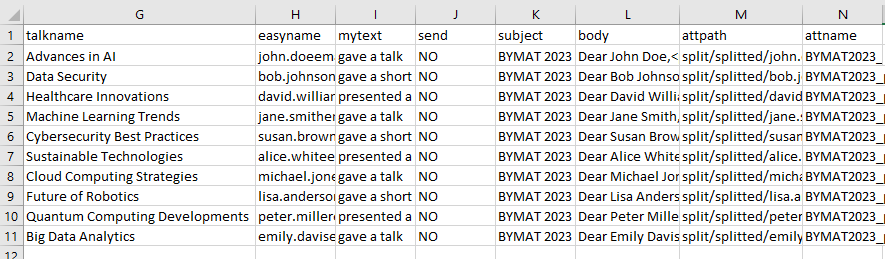
First, configure the people.xlsx file with the following table:
As seen, talks, short talks, and posters have been presented in our congress. The emails are personalized, and each participant's name is included in the body. The attachment path is /certificates/splitted/[easyname].pdf since they are not signed.
Next, execute createcsv.py. You will see that the latex/tolatex.csv file has been created.
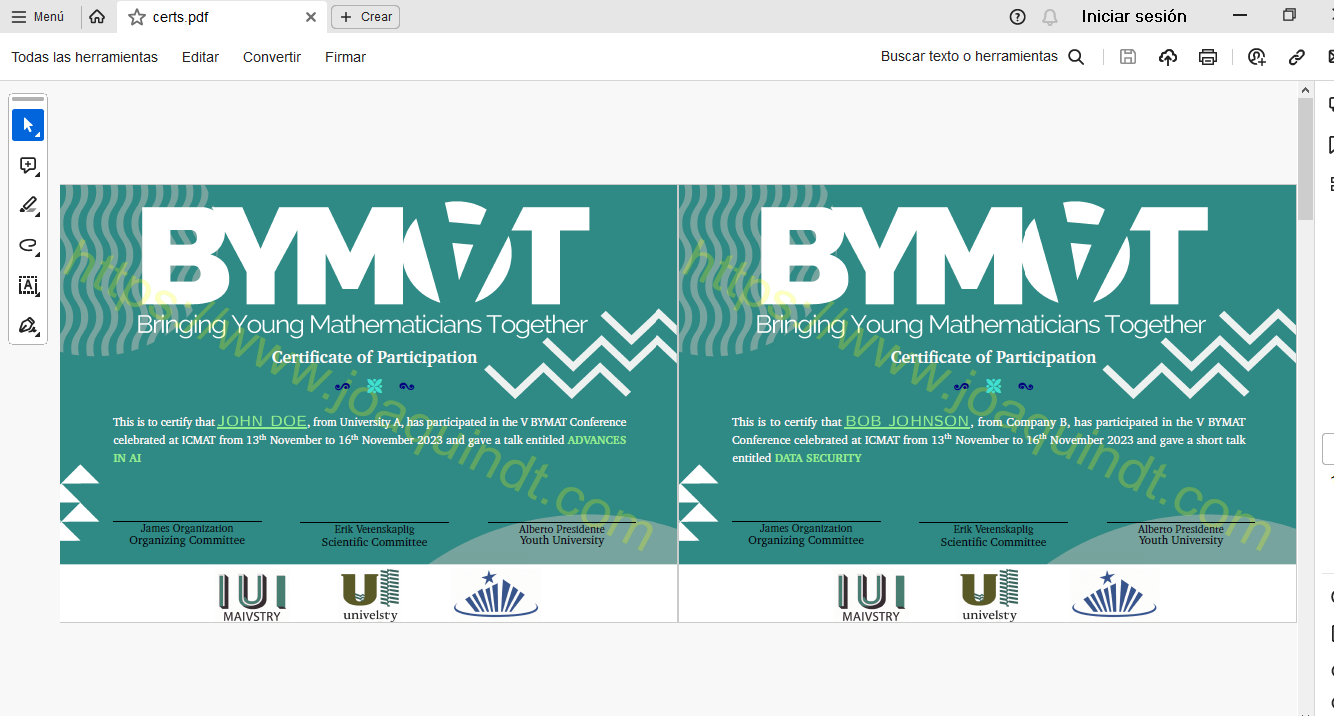
Now, compile certs.tex to generate certs.pdf, a file with several pages, each representing a different certificate.
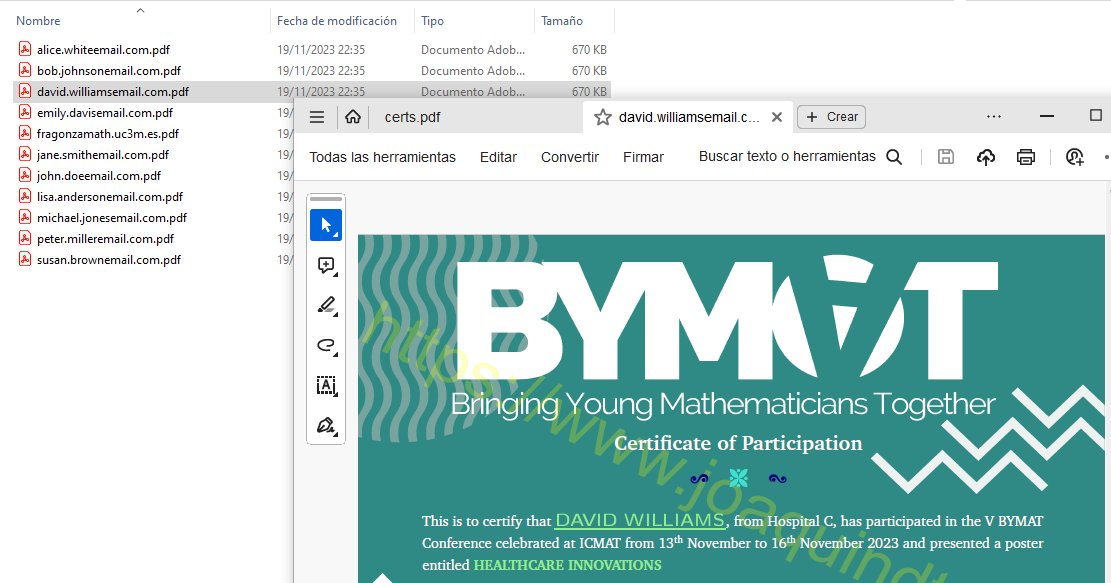
Then, run split.py to separate each certificate into individual files in the /certificates/splitted folder. You can view them in the folder.
For the last step, sending the certificates, you need to configure the SMTP settings in the send.py file. Specifically, in this section of the code:
# SMTP server configuration and credentials
smtp_server = 'YOURSMTP'
smtp_port = 587  # The port may vary depending on the SMTP server
smtp_usuario = 'YOURUSER'
smtp_contraseña = 'YOURPASS'
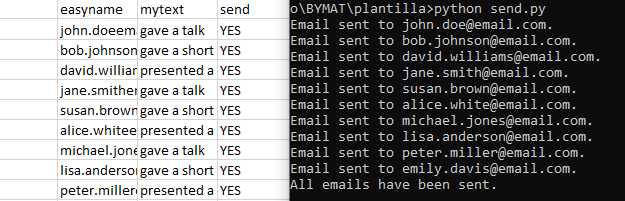
Once configured, change the values of the column send of people.xlsx by "YES" and run send.py. The emails will be automatically sent.